West Coast Family's New East Coast Garden Coop

When the Woolworth family moved from Oregon to Charlotte, they may have said goodbye to the Pacific Northwest, but their love of organic gardening came east, right along with them. Homegrown organic produce and backyard eggs were an everyday part of the couple’s life out west. Now the Woolworth’s are a busy family of four and their two small children were just as eager as mom and dad to find the right nook in the backyard for their new chicken coop.
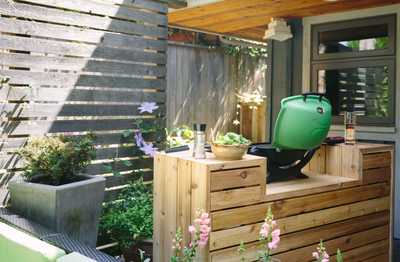
Tall shade trees line both sides of the family’s backyard, and we quickly identified several sites that had the right combination of sun and shade. While winter sometimes serves up cold weather here in Charlotte, keeping a backyard flock cool in the summer is usually more challenging than keeping hens warm in winter. With this in mind, we selected a site beneath several trees, that gets morning sun and shade in the afternoon. This site is right across the backyard from the kids play set, and within easy view of the windows along the back of the house. Backyard chickens are surprisingly entertaining, and it’s way more fun when you can see them!
With the coop’s location picked, the next step was to choose the right design. Although they weren’t new to backyard chickens, the Woolworth’s are a lot busier now, with two careers and two small children. They wanted to start with a manageable flock of three hens, and a coop that was large enough to keep them safe and comfortable, even if the birds don’t come out to forage every day. In Oregon, the couple experienced firsthand just how determined predators can be, and they were understandably concerned about the security of their new chicken coop.
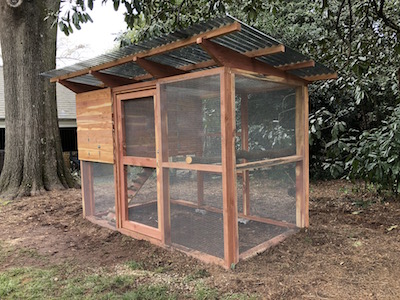
But the Garden Coop had all the strength and security they wanted, plus an attractive design that fit right into their upscale Charlotte neighborhood.
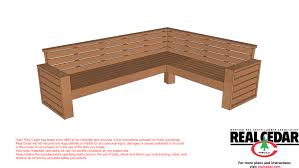
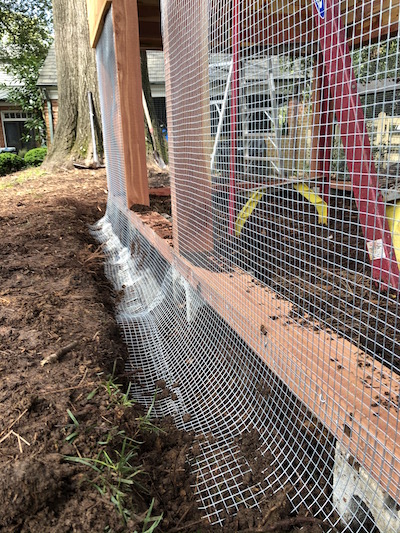
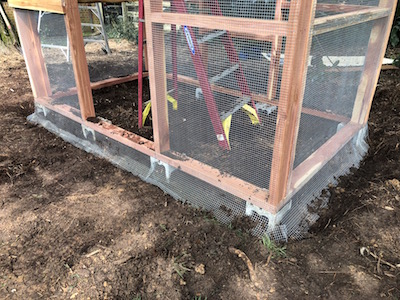
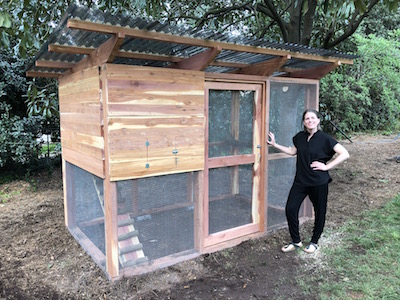
The Garden Coop’s burly, red cedar frame sits on eight concrete piers that put the it on a level foundation and prevent contact between the wood and the ground. This substantially extends the life of the coop’s frame, and any outdoor wood project, for that matter. Rough-sawn red cedar lumber, milled to a true 2”x4”, gives our version of the Garden Coop a tremendous amount of strength, that frustrates even larger predators like dogs and coyotes. Smaller, but perhaps more wily bandits like raccoons don’t fare any better with the Garden Coop’s 1/2” steel mesh siding, that’s buried around the entire perimeter of the coop. Since wild animals don’t have the body mass to shove a coop door open, they’ll use their claws to try and pull outward to open doors.The Garden Coops’s ultra-secure entry door opens inward, and has a tight fitting threshold design that makes it impossible for dogs, raccoons, coyotes, possums, and other common chicken predators to pull the door outwards.
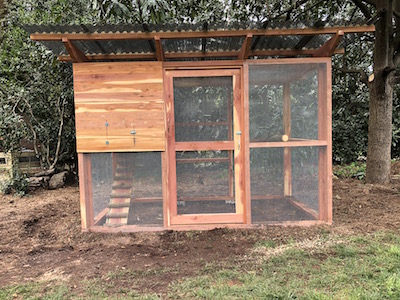
One of the outstanding features of the Garden Coop is the fully covered run that’s built into the design. Tinted polycarbonate roof panels, with a generous overhang, keep a backyard flock dry, and provide extra shade on hot days, and needed sunlight during the winter months.
The roost box features a simple egg door - well out of reach of raccoons - that allows access from outside the coop to the double nesting box. Inside the coop, the large hinged door on the side of the roost box makes cleaning the Garden Coop a task that can be checked off quickly and easily.
We think chickens would rather climb and roost on live branches than milled lumber, and we’re always looking around for good roost branches the same way some people score vintage furniture on the side of the road. But we didn’t have to go far to find the roost branch and ladder rungs for the Woolworth’s coop ; a small sapling that was growing right in the middle of the coop floor, and a large branch that we pruned from a nearby tree, lived on as chicken ladder rungs and a sturdy perch.
The Woolworth family may be a long way from Oregon, but with their new Garden Coop completed, they’re a lot closer to that new backyard flock. The kids think their new backyard coop is pretty cool, and neighborhood wildlife are already sizing up the stout new structure, puzzling over how to get inside. And the new flock? They’re sure to love their new home as much as we loved making it - especially those re-purposed ladder rungs and roost branch.