(704) 568-8841

STAY IN TOUCH

Follow us on TwitterFollow us on FacebookFollow us on FlickrFollow us on Pinterest

Instagram

We are active on TwitterFacebook, and Flickr with gardening tips, news, and updates. Follow us and stay in touch.

Here are some photos from our Flickr account.

Search

FREE NEWSLETTER!

Get important updates, tips & tricks on edible organic gardening, micro-farming and more. 

If you aren't one for filling out forms, fret not!

You can call us at
(704) 568-8841

Or you can send us an email
hello@microfarmgardens.com

If you want to hire us for your project, need a quote, or if you have a few questions,
fill out the following and click submit. We'd love to help. 

Fill out my online form.

Wednesday
Jun292022

Plant Pruning Fundamentals

A delightfully sunny location that you can even see from the kitchen window. A premium organic soil blend that drains well. Automated drip irrigation to make sure the plants thrive while you’re away on vacation. You’ve worked hard to get everything right in your garden, and now it shows with vigorous, healthy plants - all sprawled out and reaching high for the sun.

And when your garden looks this good, it’s difficult - sometimes very difficult - to remember that snipping off perfectly healthy parts of these thriving plants will actually improve them. 

But it will.

Skillful pruning increases plant vigor in several ways ; It thins out overcrowded foliage, allowing more air and sunlight to reach the entire garden. By pruning away superfluous foliage, energy is concentrated in more vigorous growth of the remaining plant stems. Careful pruning allows a grower to regulate the flowering, fruiting, and shape of her plants, and, of course, pruning off any obviously dead or diseased branches is a fast and effective way to improve a plant’s health.

But before you reach for the pruners, remember that plant pruning is an art that’s been refined over thousands of years, and many, many books have been written on the subject. Specific technique can vary with plant species - sometimes widely -  and it’s always best to learn any specific pruning techniques for the plant varieties you grow. Still, these basic pruning tips do apply to all plants, and if you carefully follow them, you’re almost sure to improve the health of your organic garden.


STEP ONE

Cut off any obviously dead or dying stems or branches. Remove any discolored foliage - brown or grey instead of green, for example - and any sickly looking leaves and stems that have unusual spots or blotches. 


STEP TWO

Prune away any spindly, weak-looking branches - usually found near the bottom of plants in an edible garden. As plants grow taller, these lower branches receive less sunlight. If these flimsy lower branches aren’t removed, they’ll sap the growth of the robust, new foliage, that’s in direct sunlight, near the top of the plants. Be sure to cut off these unwanted stems and branches flush with the plant’s main stem.


STEP THREE

Some plant varieties are only sturdy enough to support so many branches and limbs when the plant matures, and pruning the plant back is essential to prevent overcrowding of branches, and a loss in productivity. Cane fruits, like blackberries, are a good example of this, and should be pruned back to no more than eight canes per plant.


STEP FOUR 

With all of the ailing or overcrowded stems and branches finally pruned away, you still may need to snip off portions of the remaining, healthy branches to further shape the plants and encourage  new growth. This is where a little research into variety-specific plant pruning techniques will come in handy. 

Wednesday
Feb092022

Easy Steps to Prevent Plant Diseases and Insect Pests

Attentiveness to early warning signs. Proper nutrition. A healthy living environment. These sounds like like the core tenets of any health book or fitness magazine. But these wise steps that foster better health in the human body are also the most effective ways of preventing insect pests and diseases in plants. 

The old adage that an “ounce of prevention is worth a pound of cure” rings just as true with plants as it does with the human body. Research has proven that healthy plants can far more easily repel attacks from insect pests and diseases than ailing plants, and prevention is the key word here.  So read on, and follow these proven steps to help keep your plants thriving, and help you avoid ever having to resort to organic insect pesticide sprays, which can wipe out beneficial insects right along with the pests. 


Don’t Overcrowd the Garden

Take care that your garden isn’t over planted. The best way to accomplish this is to closely follow the spacing requirements for each variety you plant. As you plant seedlings, try to picture the plant at mature size, not the tiny seedling in front of you. This can be difficult for new gardeners who see what seems like “too much empty space” around those tiny seedlings. plan for eventual growth, and remember that when a garden is overcrowded, airflow around the plants is restricted, trapping moist, stagnant air that encourages disease and pests.


Ensure Good Drainage

Plant roots can suffocate when water floods the base of the plant during heavy rains. So keep a close eye out for any puddling after rain, and reshape the soil as needed to channel water away and avoid excessively soggy roots. 


Note Unusual Growth

Strange spots on leaves and stems, curled leaves, and abnormal and stunted growth patterns are some of the signs of an ailing plant. inspect your garden daily and catch these warning signs early enough to correct a problem before insect pests and disease pounce on the ailing plant and finish it off.


Control Weeds

Weeds aren’t just ugly and annoying, they frequently harbor plant diseases and act as alternative hosts for insect pests. And as they get larger, weeds compete with your plants for soil nutrients, air, water, and sunlight - often winning that battle as many weed varieties grow much faster than edible cultivars. So it’s best not to ever let weeds get established in the first place. While you’re in the garden each day inspecting your plants for signs of unusual growth, go ahead and pull up any weeds you find. Better yet, prevent weeds from growing in the first place by covering the soil surface with organic compost or a similar mulch. Not only does mulching your garden block sunlight to weed seeds, but it helps stabilize the soil temperature - protecting beneficial soil organisms from soaring summer high temperatures and helping prevent water loss from evaporation. 


Wednesday
Jan122022

How Plant Fertilizers Work

Understanding how plant fertilizers work begins with an understanding of the nutrients that plants need. And the focus of this short article is to cast a ray of light on plant fertilizers, which include both synthetic and organic fertilizers. Of course, there’s much more to gardening than simply plant nutrients and plant growth, but let’s begin with the basic science of how plant fertilizers work - both synthetic and organic. 

Every plant  - from a blade of grass to a towering oak tree - needs varying amounts of the three primary elements Nitrogen, Phosphorous, and Potassium, at different times during the plant’s life cycle. For optimum health, plants do require other secondary elements and trace minerals, but these three primary elements from the periodic table are the most important. Fertilizer labels display these three elements using their international symbols - N for Nitrogen, P for Phosphorous, and K for Potassium - along with a number that indicates the percentage of the fertilizer that’s made up of each element. For example, if a  fertilizer label reads 10-5-3 , ten percent of the bag’s contents is Nitrogen, five percent Phosphorous, and three percent is Potassium. These numbers, often listed along with an application rate on the label, are there to help you apply the right amount of fertilizer in your garden. 

Simply put, all fertilizers  - both chemical and organic - work by delivering N, P and K to plants, and these three primary elements can only be absorbed by plants after the elements have been broken down into molecular form. Synthetic fertilizers have been engineered to dissolve quickly into molecular form, and the accelerated plant growth induced by these fast-acting fertilizers is attractive to many commercial growers. After all, that next crop of plants doesn’t really know or care how it gets its supply of Nitrogen, Phosphorous, and Potassium. So why not get to harvest time faster, and with more profit? Plenty of commercial growers see it that way.

Organic fertilizers depend on microorganisms naturally present in the soil to break the product down into molecular form, and the pace of this microbial activity is contingent on the temperature of the soil. So, not surprisingly, livestock manures, bat guano, bone meal, blood meal, kelp, meal, alfalfa meal, etc. etc. etc., all take far longer to break down into molecular form than water-soluble synthetic fertilizers. So why would a grower use a fertilizer that works more slowly and may even cost more?

Here’s where difference between the two growing methods sharply diverges. While chemical fertilizers can churn out fast, shiny crop yields for a time, often that water-solubility that delivers nutrients in the blink of an eye, also means that those nutrients will just as rapidly leach out of the soil. And over time, this nutrient leaching process can leave behind high levels of salts in the soil. This frequently alters soil pH levels, making the soil less suitable for cultivation, or sometimes even completely sterile, and only restored with tremendous effort. Synthetic fertilizers can also harm or entirely destroy beneficial soil organisms like earth worms and soil microbes, but these organisms aren’t needed to convert synthetic fertilizer into molecular form, and therefore often play little or no role in the growth of a chemically fertilized crop.

Meanwhile, organic gardening places tremendous emphasis on the relationship that plants have with the many beneficial organisms that are naturally present in the soil. You might even say that these soil organisms, including earth worms and microbes, are everything to an organic gardener. After all, organically-grown plants would receive no nutrients without the presence of these essential organisms that break down organic fertilizer into molecular form. Now, it’s true that organically-grown crops do grow more slowly than those fueled by synthetic fertilizers. But consider that with the careful addition of organic material, including manures, humus, and compost, organic soil -  while under continuous cultivation - can actually become more fertile over time. 

Put simply, one method could eventually result in soil sterility while another could lead to improved soil fertility. That's quite a difference, and well worth your thoughtful consideration.

And, it's no secret where we fall on this topic - after all, we’re Microfarm Organic Gardens. Our focus is backyard edible gardening, where it’s hard to picture a grower in such a hurry that she would choose a synthetic fertilizer over an organic option for an edible garden planted to feed her family healthy produce. 

But commercial agriculture is another story, and far too vast a political topic to be explored in this short article. So, true to the title of this piece, we’ve briefly weighed the specifics of how fertilizers work - both chemical and organic. Interested in learning more? Hopefully so, and we’d be delighted if you used this text as a starting point for further research on the topic. Let prudence be your guide in learning about and using fertilizers. And remember; gardening without an understanding or appreciation of your soil, would be roughly equivalent to learning all about various medical drugs and remedies without first seeking any understanding of what the human body requires for optimum health.


Tuesday
Jan042022

Goodbye Sore Backs, Hello Kitchen Garden

William and Elizabeth McKee have a cheerfulness and contagious optimism that could thaw half of Siberia.  And it’s no surprise that when disease finally forced the removal of two colossal shade trees on the couple’s Chantilly property, they quickly separated the silver lining from the understandable disappointment. Areas of the their yard that once nurtured delicate, shade-loving ornamental plant varieties, were now opened up to hours of direct sunlight. So the McKee’s decided to plant an organic garden.  

And the site that they selected for their new garden had all the key advantages that we look for when choosing an edible garden site; Plenty of sunlight. A water supply nearby. And a very short walk to the kitchen. With these essential considerations working in their favor, plus a worthy effort with a garden hoe and lots of organic compost, an area along the left side of their home became an organic garden. Tomatoes and peppers thrived there,  proving that there was, indeed, more than enough sunlight to grow any edible variety, even heat-loving summer vegetables.

But that success was hard-earned and came at the expense of the perpetual struggle against a stubborn clay soil that resisted attempts to improve drainage and aeration, swallowing up compost and other organic soil amendments, with only modest improvements in soil quality to show for it.


By the end of the summer, two sore backs and a sprawling, weed-choked garden seemed to cry out together, “ There has to be a better way!” 

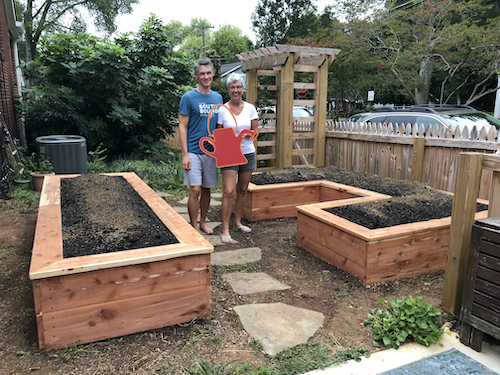
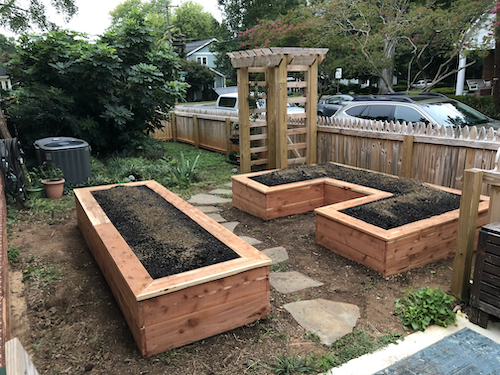
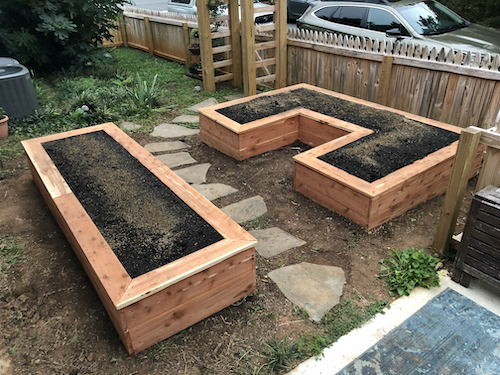
There is a better way, and the McKee’s soon discovered that cedar raised beds were the answer. After searching around for the right raised bed design - carefully reviewing raised bed kits, and other raised beds of various style and construction - they at last selected our 18”- tall Kitchen Garden raised bed design. All that hacking away in vain at a churlish slab of clay was finally disappearing in the rearview mirror. 

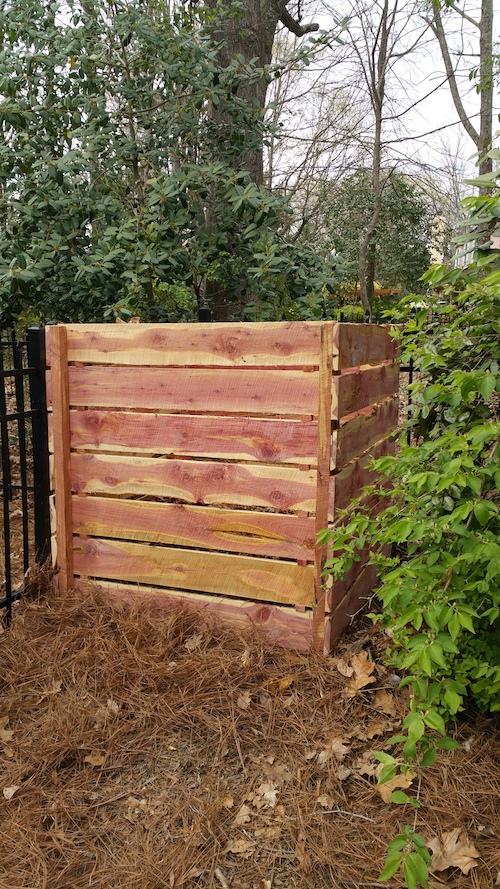
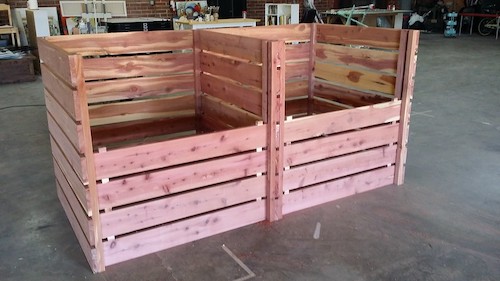
The Kitchen Garden is made with aromatic red cedar  - a naturally durable wood that’s famously long lasting in outdoor projects like raised beds, chicken coops, greenhouses, and compost bins. Red Cedar’s well-founded reputation for resistance to insects and decay is no trendy exaggeration; it’s been well-earned over the eons of this special tree’s service to humanity. 

The McKees’ organic garden features two raised beds. One is a U-shaped Kitchen Garden that measures 3’ wide, 9’ across the back and 6’ long on the sides. Just across the flagstone pathway sits a 3’x 9’ Kitchen Garden raised bed.

One of the key advantage of the 18” height of the kitchen garden is the reduced wear and tear on a gardener’s body. With its sturdy seating cap placed at the standard height of a chair or bench seat, the Kitchen Garden design makes it easy to relax and tend your garden.

Another key advantage of the 18” height of the Kitchen Garden design is the large volume of premium organic soil available to nourish plants. Like all of our Kitchen Garden raised beds, the McKee’s new raised beds are filled with a lightweight organic soil blend that allows water to easily drain through, helping avoid the problems that come along with perpetually soggy soil. This special horticultural grow media is a blend of mushroom compost, shredded pine bark fines, and slate pebbles, and allows plant roots to quickly grow through the soil, and take in air and nutrients. 

And it was an easy decision to add drip irrigation to the garden. Both William and Elizabeth work full time, and they heartily appreciated the amount of time the automated drip irrigation watering system will save. Both raised are fitted with grids of 1/2” drip tubing, with emitters spaced 12” apart, and that each deliver about a gallon of water per hour. These irrigation grids are buried a few inches below the soil surface, which conserves water by delivering it right to the plant root zone. In raised beds, this buried-drip irrigation method is far preferable to above- ground irrigation sprayers that often put too much water on the plant foliage instead of the roots. Above-ground irrigation sprayers tend to keep plant foliage perpetually wet, encouraging fungal diseases in edible plant varieties, and potentially scalding plants and wasting water through evaporation on hot days. The drip tubing in both raised beds is connected underground and routed to the nearby spigot, where watering is controlled by a battery-powered timer.


With the raised beds leveled, staked down, and filled with organic soil, and the automated drip irrigation system programmed, it’s time for the McKees to start planting. And what does the future hold for Elizabeth and William’s new garden? Tasty organic produce? Fresh air and sunshine? New gardening adventures together? Surely all this and more.

But the sore backs and the clash with clay are finally a thing of the past. 


Friday
Dec172021

Backyard Compost Essentials

Making your own organic compost has to be one of the least complicated garden projects you’ll ever take on. And it’s no exaggeration to say that it’s one of the most useful steps you can take to improve the health of your garden. Simply put, the quality of your homemade organic compost will almost surely far exceed anything that can be purchased in a bag.

 
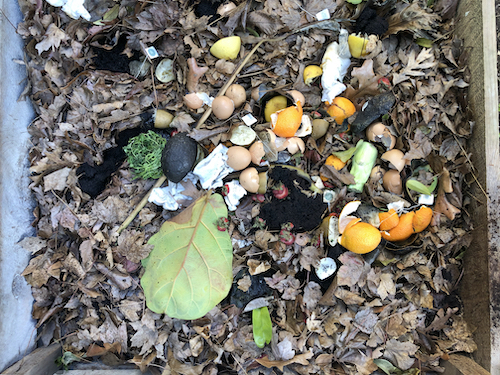
So the sooner you can turn all those orange peels, egg shells, leaves, and grass clippings into organic compost and add it to your garden, the better. And if you consider a few simple guidelines, you’ll speed up a process that Nature already has well under control. Simply pile on the right things and avoid adding the wrong things to your compost bin, and you really can’t fail.


Start with Layers

Your compost pile will decompose faster when it has a fairly even combination of nitrogen-based and carbon-based organic material. These are often referred to as ‘green’ ( nitrogen-based ) and ‘brown’ (carbon-based) materials, and too much of one or the other can result in unpleasant odor, and a far slower decomposition process. Examples of nitrogen-based material include grass clippings, banana peels and coffee grinds. Dry, fallen leaves are a common source of carbon-based material for your compost pile. 

Building your compost pile with alternating layers of nitrogen and carbon based materials is an excellent way to ensure the right ratio between these materials. Adding a shovelful of native soil and a handful of bonemeal with each layer helps ensure the presence and health of the hardworking aerobic microorganisms that are eager to break down the material. Now, layering does make your initial compost pile nice and neat. But, alas -  the first time you turn the compost pile, those tidy layers will get all mixed up. But not to worry, because maintaining layers isn’t essential for the material to decompose. As long as you’ve added the right things in the right ratio, the stuff in your compost pile will still break down, layers or no layers.


Water or Cover as Needed

Your gardening intuition probably tells you that the material in your compost pile should be somewhere between bone-dry and soaking wet. And if so, you should trust that astute inner  voice. The idea is to add water to the compost pile during prolonged dry weather, or cover the pile as needed during extremely wet weather, to maintain the moist consistency of a wrung-out sponge. This will foster the well-being of the aerobic microbes that break down the material, and help prevent plant nutrients from leaching out of the compost pile during heavy rains.


Turn the Material to Speed up the Process

Consider that turning the compost pile introduces oxygen, increasing the output of the aerobic organisms that continuously work to break down the material. Turn the material in the center of the pile outward, add a splash of water and perhaps a handful of bone meal, and you’ll help those hardworking aerobic microbes make good use of their new supply of oxygen. Turning your compost pile is not a wasted effort, and and the more often you turn the pile, the faster the material will break down. 

But don’t fret if the idea of turning all that material doesn’t excite you. Turning the compost pile simply speeds up a natural process that will happen anyway - with or without your help.