(704) 568-8841

STAY IN TOUCH

Follow us on TwitterFollow us on FacebookFollow us on FlickrFollow us on Pinterest

Instagram

We are active on TwitterFacebook, and Flickr with gardening tips, news, and updates. Follow us and stay in touch.

Here are some photos from our Flickr account.

Search

FREE NEWSLETTER!

Get important updates, tips & tricks on edible organic gardening, micro-farming and more. 

If you aren't one for filling out forms, fret not!

You can call us at
(704) 568-8841

Or you can send us an email
hello@microfarmgardens.com

If you want to hire us for your project, need a quote, or if you have a few questions,
fill out the following and click submit. We'd love to help. 

Fill out my online form.

Saturday
Jul022022

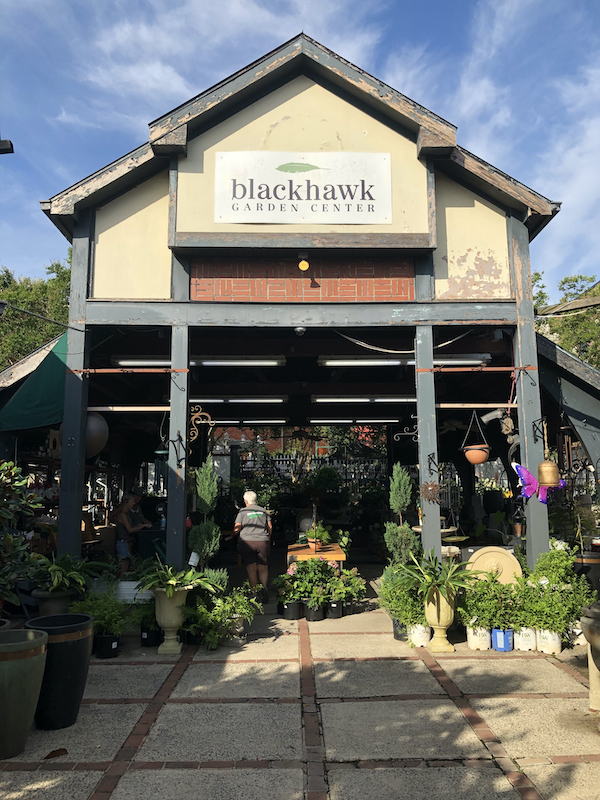
Why is Our Sign on the Wall at Blackhawk Garden Center?

If you’re a gardener, and you live in the Charlotte area, you’ve almost surely been to Blackhawk Garden Center, located in the back court at Park Road Shopping Center. They have the absolute highest quality garden merchandise, including live plants, garden art, imported ceramic planters, sturdy garden tools, organic insect pest control sprays, bagged organic soil products,  and much, much more. But what really makes Blackhawk Garden Center stand out among the many other places where you can pick up a shovel or a bag of potting soil, is their people. Every team member there is an experienced grower that either already knows the answer to your plant question, or will quickly find out while you wait. They’ll even help you load your purchases into your car. 


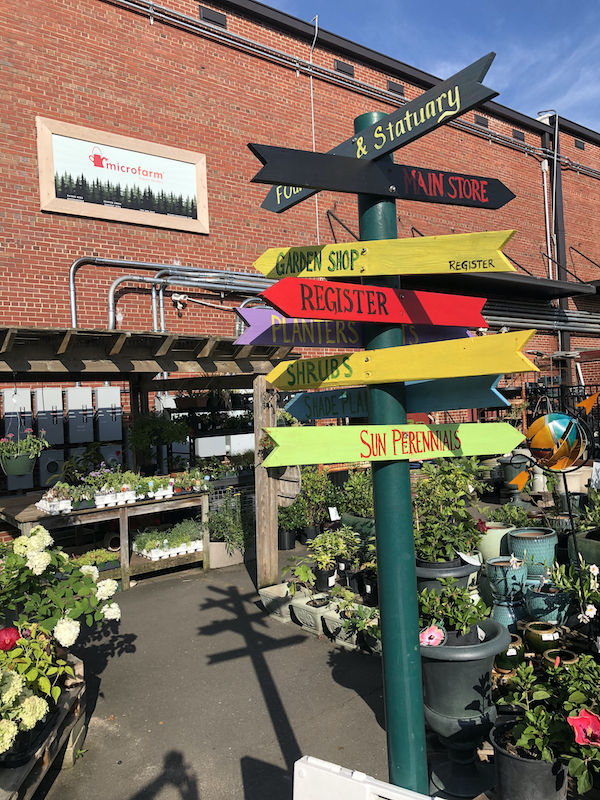
Now, if you’re already a patron of Blackhawk Garden Center, you’ve probably noticed our company’s sign mounted in a red cedar frame, and placed high on the brick wall that faces the shopping center’s back court parking lot. If you go to Blackhawk Garden Center for the first time, look out for the sign - It’s hard to miss, unless you stare at your shoes the whole time you’re there. 

So why is the Microfarm Organic Gardens sign up there? Read on, because the primary goal of this article is to shed a little light on that sign and our close relationship with the garden experts at Blackhawk Garden Center.


For eleven years now, we’ve served the Charlotte area with high-quality cedar garden products, including raised beds, chicken coops, greenhouses, compost, bins, potting benches, and more. Blackhawk Garden Center’s discerning customers often ask staff if they stock these kinds of larger, and often very heavy items. If the answer is no, customers frequently ask Blackhawk staff for a trusted referral to a company like Microfarm, that can build and deliver the desired cedar garden item. Now, Blackhawk Garden Center does have a sprawling area, with every square foot seemingly filled with garden merchandise, but they simply don’t have space to stock most of the bulky cedar garden items that we build and install.


So it didn’t take long for us to connect, and for Microfarm to earn a place on Blackhawk Garden Center’s highly-respected list of local contractor referrals. And our relationship with them has blossomed ever since.

You see, we’re a niche outfit,  and our days are filled with designing and building high-quality cedar garden stuff. So we prefer not to staff and maintain a retail location -  just our modest-sized workshop across town in Charlotte’s NoDa neighborhood.


But Blackhawk Garden Center, on the other hand, has a remarkable retail store, with plenty of parking, in a convenient location, and staffed with Charlotte’s most learned and experienced plant experts. 

So we make a good match, and the partnership between Microfarm Organic Gardens and Blackhawk Garden Center has thrived over the years,  as each one brings unique value to the table that well serves the other’s customers.

And if you’re a grower, and haven’t been to Blackhawk Garden Center yet, make plans to visit - you’ll be delighted you did. Look around at all the smart garden merchandise on display there, and don’t be shy about asking their staff a tough garden question or two - they’ll almost surely know the answers, and they can tell you a lot abut what we do here at Microfarm, too.


Thursday
Jun302022

Five Crucial Considerations for Rooftop and Terrace Gardens


It sure would make it easy if every grower had a spacious, level backyard with six hours of sunlight, a water supply nearby, and a convenient pathway that leads from the back door to the organic garden. But much of the world’s population lives in multifamily housing. There are lots of places to call home that don’t have a backyard ; from two-story townhomes in tranquil neighborhoods, to urban condo and apartment buildings that stretch high into the skyline of the busiest cities, and everything in between. Sometimes these multifamily communities have a site on ground level for an organic garden that residents can share. But often, the only option is to place raised beds on the building’s actual rooftop, or on an existing, above-ground recreation area, like a pool deck or green roof park. And some multi-family building residents do have the option to have a garden on their own unit’s terrace or balcony, which is certainly more convenient than a shared rooftop garden, but is also subject to many of the same considerations described below.


Strength of the roof

Remember that raised beds filled with organic soil are heavy, and this is perhaps the very first consideration, before you embark on a rooftop garden project. One 4’x8’x18” Kitchen Garden raised beds, for example, requires about two cubic yards of soil, which tips the scale at about 2000 pounds for just the dry soil alone. Imagine the added weight that single garden bed takes on when every cubic inch of the soil is soaked through during a rainstorm, plus add in the weight of the actual cedar garden bed itself, and...well, you get the idea.

Many high-rise condo and apartment buildings already have a pool deck or similar community outdoor recreation deck, with landscaping, trees, pathways, benches, a covered area for grilling, etc. Sites like this are almost surely more than strong enough to carry the additional load of an organic garden that includes multiple raised beds, and the property will have the technical data to confirm the load capacity of the roof. For smaller rooftop gardens without this data readily available, a structural engineer should always be consulted to confirm that the roof can carry the additional load of a rooftop garden. What sad and dangerous irony to put an organic  garden up on the roof, only to have it crash through the ceiling on top of the dinner party where the first harvest of seasonal greens has just been plated and served to your guests.

Once the load capacity of the roof is confirmed, consider the actual roof material itself ; the rubber roof membrane, asphalt shingles, slate, or other roofing material that actually keeps rainwater from leaking into the building. Could raised beds realistically be installed without damaging the roof material? Can the existing roof material handle the added foot traffic of gardeners walking to, from, and around the garden? Should the existing roof be covered with a protective product before any work begins? Consider this carefully, and remember that roof repairs can get very pricey, especially on large buildings with high-tech, multi layer roof membrane material.


Drainage

Soil drainage is always important in an organic garden, and often even more so on a rooftop garden. In a backyard setting, it’s easy enough to evaluate the setting, and place a raised bed so that it doesn’t block any existing stormwater drainage swales or channels, and then fill the planter with a lightweight organic soil blend that allows water to easily pass through the grow media, and into the native soil below the raised bed. Drainage issues solved, time to start planting.

But It’s not always that simple with a rooftop or terrace garden. An existing rooftop recreation deck that already has landscaping, should already have a carefully designed system to channel rainwater safely off of the rooftop. But before you add an organic garden, you should consider how the water runoff from the garden will drain through the existing drainage system. Is the existing system adequate? Should it be modified to accommodate the addition of raised beds on the rooftop? 

For terrace and balcony plantings, will the water drain neatly away into an existing rain gutter system, or would it cascade like a waterfall onto the downstairs neighbor’s balcony?


Sunlight

Many popular edible plant varieties need a minimum of six hours of direct sunlight, and at first glance, it would seem that any rooftop would surely deliver those six hours, and probably  many more. But in many urban areas, the rooftop of one building may be shaded for some or even much of the day by taller, adjacent buildings. Often the above-ground outdoor recreation area of a high rise apartment building may only four or five stories high, meaning that the deck may be shaded by the much taller, residential portion of the building itself. And sunlight is an even bigger factor when considering a garden on a terrace or balcony. Many leafy green varieties can thrive with as little as four hours of direct sunlight, but if your unit’s terrace doesn’t get at least that much sunlight, it would be better to look around for a sunnier place to garden.

And for those rooftop gardens that actually do get a whole day of uninterrupted sun exposure, you may have to add shade to maintain a healthy growing environment. This can be accomplished by hanging shade cloth above the garden, by building a pergola with lath strips above the garden, etc.


Water Supply

Everyone knows that plants need water. Exposed rooftop gardens, with perpetually windy conditions, and many hours of direct sunlight, need a lot of water - usually every day.  Does your rooftop garden site have a convenient water supply? Is there an existing drip irrigation system that can be tapped into to water the new raised beds on a dedicated irrigation zone via the main control panel? If there’s not an existing irrigation system, can one be installed? If the answer is no, and there’s only a spigot and a garden hose up there, and the garden must be watered by hand, is there someone committed enough to carry out that often unglamorous and time-consuming task - every day during the hottest parts of the summer? Be realistic and carefully consider how the garden will be watered before investing the time and money in building your rooftop garden.

And if you’re considering an organic garden on your own unit’s terrace, watering logistics are especially important. Is there a spigot or would you have to water the garden with a watering can or bucket? Can a watering can be filled in the sink, or would you have to fill one in the bathtub? How many trips back and forth would it take to keep your balcony garden well watered?


Access

Your building or home’s rooftop might be the only place to put an organic garden. But do you have permission from the property management to even go up on the roof, let alone have a garden up there? And if you do have the property management’s full backing for your rooftop garden project, but how easy is it to get up there? Is there a  standard-sized door that leads out onto the roof? How would you bring you bring lumber for making raised beds, and other growing supplies from the ground floor up onto the roof? Large apartment and condo buildings have freight elevators that make this process possible, but sometimes tedious when multiple trips up and down are needed to compete the project. But a stairwell may be the only way up to the roof for smaller multifamily buildings and single family homes with a section of flat roof suitable for a rooftop garden. In cases like this, bringing building materials and soil up flights of stairs is unrealistic and a mechanical lift of some type is needed to bring these materials up to the rooftop.

Of course, once the garden is in place, it’ll need regular maintenance. Is there easy, open access to the rooftop for the ongoing maintenance that’s essential for a successful rooftop garden? Hopefully, the answer is yes, and you’re ready to begin designing your new rooftop garden.

Having an organic garden up on the roof is a lot of fun, and it’s easy to get caught up in the excitement and skip important steps in the process. Resist the temptation to “rush it”, and make costly mistakes that could have easily been avoided. Take your time, consider each one of these points thoughtfully, your rooftop garden is sure to be a success.


Wednesday
Jun292022

Plant Pruning Fundamentals

A delightfully sunny location that you can even see from the kitchen window. A premium organic soil blend that drains well. Automated drip irrigation to make sure the plants thrive while you’re away on vacation. You’ve worked hard to get everything right in your garden, and now it shows with vigorous, healthy plants - all sprawled out and reaching high for the sun.

And when your garden looks this good, it’s difficult - sometimes very difficult - to remember that snipping off perfectly healthy parts of these thriving plants will actually improve them. 

But it will.

Skillful pruning increases plant vigor in several ways ; It thins out overcrowded foliage, allowing more air and sunlight to reach the entire garden. By pruning away superfluous foliage, energy is concentrated in more vigorous growth of the remaining plant stems. Careful pruning allows a grower to regulate the flowering, fruiting, and shape of her plants, and, of course, pruning off any obviously dead or diseased branches is a fast and effective way to improve a plant’s health.

But before you reach for the pruners, remember that plant pruning is an art that’s been refined over thousands of years, and many, many books have been written on the subject. Specific technique can vary with plant species - sometimes widely -  and it’s always best to learn any specific pruning techniques for the plant varieties you grow. Still, these basic pruning tips do apply to all plants, and if you carefully follow them, you’re almost sure to improve the health of your organic garden.


STEP ONE

Cut off any obviously dead or dying stems or branches. Remove any discolored foliage - brown or grey instead of green, for example - and any sickly looking leaves and stems that have unusual spots or blotches. 


STEP TWO

Prune away any spindly, weak-looking branches - usually found near the bottom of plants in an edible garden. As plants grow taller, these lower branches receive less sunlight. If these flimsy lower branches aren’t removed, they’ll sap the growth of the robust, new foliage, that’s in direct sunlight, near the top of the plants. Be sure to cut off these unwanted stems and branches flush with the plant’s main stem.


STEP THREE

Some plant varieties are only sturdy enough to support so many branches and limbs when the plant matures, and pruning the plant back is essential to prevent overcrowding of branches, and a loss in productivity. Cane fruits, like blackberries, are a good example of this, and should be pruned back to no more than eight canes per plant.


STEP FOUR 

With all of the ailing or overcrowded stems and branches finally pruned away, you still may need to snip off portions of the remaining, healthy branches to further shape the plants and encourage  new growth. This is where a little research into variety-specific plant pruning techniques will come in handy. 

Wednesday
Feb092022

Easy Steps to Prevent Plant Diseases and Insect Pests

Attentiveness to early warning signs. Proper nutrition. A healthy living environment. These sounds like like the core tenets of any health book or fitness magazine. But these wise steps that foster better health in the human body are also the most effective ways of preventing insect pests and diseases in plants. 

The old adage that an “ounce of prevention is worth a pound of cure” rings just as true with plants as it does with the human body. Research has proven that healthy plants can far more easily repel attacks from insect pests and diseases than ailing plants, and prevention is the key word here.  So read on, and follow these proven steps to help keep your plants thriving, and help you avoid ever having to resort to organic insect pesticide sprays, which can wipe out beneficial insects right along with the pests. 


Don’t Overcrowd the Garden

Take care that your garden isn’t over planted. The best way to accomplish this is to closely follow the spacing requirements for each variety you plant. As you plant seedlings, try to picture the plant at mature size, not the tiny seedling in front of you. This can be difficult for new gardeners who see what seems like “too much empty space” around those tiny seedlings. plan for eventual growth, and remember that when a garden is overcrowded, airflow around the plants is restricted, trapping moist, stagnant air that encourages disease and pests.


Ensure Good Drainage

Plant roots can suffocate when water floods the base of the plant during heavy rains. So keep a close eye out for any puddling after rain, and reshape the soil as needed to channel water away and avoid excessively soggy roots. 


Note Unusual Growth

Strange spots on leaves and stems, curled leaves, and abnormal and stunted growth patterns are some of the signs of an ailing plant. inspect your garden daily and catch these warning signs early enough to correct a problem before insect pests and disease pounce on the ailing plant and finish it off.


Control Weeds

Weeds aren’t just ugly and annoying, they frequently harbor plant diseases and act as alternative hosts for insect pests. And as they get larger, weeds compete with your plants for soil nutrients, air, water, and sunlight - often winning that battle as many weed varieties grow much faster than edible cultivars. So it’s best not to ever let weeds get established in the first place. While you’re in the garden each day inspecting your plants for signs of unusual growth, go ahead and pull up any weeds you find. Better yet, prevent weeds from growing in the first place by covering the soil surface with organic compost or a similar mulch. Not only does mulching your garden block sunlight to weed seeds, but it helps stabilize the soil temperature - protecting beneficial soil organisms from soaring summer high temperatures and helping prevent water loss from evaporation. 


Wednesday
Jan122022

How Plant Fertilizers Work

Understanding how plant fertilizers work begins with an understanding of the nutrients that plants need. And the focus of this short article is to cast a ray of light on plant fertilizers, which include both synthetic and organic fertilizers. Of course, there’s much more to gardening than simply plant nutrients and plant growth, but let’s begin with the basic science of how plant fertilizers work - both synthetic and organic. 

Every plant  - from a blade of grass to a towering oak tree - needs varying amounts of the three primary elements Nitrogen, Phosphorous, and Potassium, at different times during the plant’s life cycle. For optimum health, plants do require other secondary elements and trace minerals, but these three primary elements from the periodic table are the most important. Fertilizer labels display these three elements using their international symbols - N for Nitrogen, P for Phosphorous, and K for Potassium - along with a number that indicates the percentage of the fertilizer that’s made up of each element. For example, if a  fertilizer label reads 10-5-3 , ten percent of the bag’s contents is Nitrogen, five percent Phosphorous, and three percent is Potassium. These numbers, often listed along with an application rate on the label, are there to help you apply the right amount of fertilizer in your garden. 

Simply put, all fertilizers  - both chemical and organic - work by delivering N, P and K to plants, and these three primary elements can only be absorbed by plants after the elements have been broken down into molecular form. Synthetic fertilizers have been engineered to dissolve quickly into molecular form, and the accelerated plant growth induced by these fast-acting fertilizers is attractive to many commercial growers. After all, that next crop of plants doesn’t really know or care how it gets its supply of Nitrogen, Phosphorous, and Potassium. So why not get to harvest time faster, and with more profit? Plenty of commercial growers see it that way.

Organic fertilizers depend on microorganisms naturally present in the soil to break the product down into molecular form, and the pace of this microbial activity is contingent on the temperature of the soil. So, not surprisingly, livestock manures, bat guano, bone meal, blood meal, kelp, meal, alfalfa meal, etc. etc. etc., all take far longer to break down into molecular form than water-soluble synthetic fertilizers. So why would a grower use a fertilizer that works more slowly and may even cost more?

Here’s where difference between the two growing methods sharply diverges. While chemical fertilizers can churn out fast, shiny crop yields for a time, often that water-solubility that delivers nutrients in the blink of an eye, also means that those nutrients will just as rapidly leach out of the soil. And over time, this nutrient leaching process can leave behind high levels of salts in the soil. This frequently alters soil pH levels, making the soil less suitable for cultivation, or sometimes even completely sterile, and only restored with tremendous effort. Synthetic fertilizers can also harm or entirely destroy beneficial soil organisms like earth worms and soil microbes, but these organisms aren’t needed to convert synthetic fertilizer into molecular form, and therefore often play little or no role in the growth of a chemically fertilized crop.

Meanwhile, organic gardening places tremendous emphasis on the relationship that plants have with the many beneficial organisms that are naturally present in the soil. You might even say that these soil organisms, including earth worms and microbes, are everything to an organic gardener. After all, organically-grown plants would receive no nutrients without the presence of these essential organisms that break down organic fertilizer into molecular form. Now, it’s true that organically-grown crops do grow more slowly than those fueled by synthetic fertilizers. But consider that with the careful addition of organic material, including manures, humus, and compost, organic soil -  while under continuous cultivation - can actually become more fertile over time. 

Put simply, one method could eventually result in soil sterility while another could lead to improved soil fertility. That's quite a difference, and well worth your thoughtful consideration.

And, it's no secret where we fall on this topic - after all, we’re Microfarm Organic Gardens. Our focus is backyard edible gardening, where it’s hard to picture a grower in such a hurry that she would choose a synthetic fertilizer over an organic option for an edible garden planted to feed her family healthy produce. 

But commercial agriculture is another story, and far too vast a political topic to be explored in this short article. So, true to the title of this piece, we’ve briefly weighed the specifics of how fertilizers work - both chemical and organic. Interested in learning more? Hopefully so, and we’d be delighted if you used this text as a starting point for further research on the topic. Let prudence be your guide in learning about and using fertilizers. And remember; gardening without an understanding or appreciation of your soil, would be roughly equivalent to learning all about various medical drugs and remedies without first seeking any understanding of what the human body requires for optimum health.