How to Make a Sturdy Cedar Trellis
 Sunday, April 8, 2012 at 3:20PM
 Climbing/vine type plants like cucumbers, pole beans and snow peas require the support of a trellis. Sure there are plenty of big box stores and garden centers where you can buy an inexpensive trellis, but gardeners who want something more memorable and unique, might try this simple, sturdy design made using Western Red Cedar lumber.
Materials List:
4 or 5 Western Red Cedar 5/4” x 6” x 8’ rough sawed deck boards (depending on how tall your trellis is)
2 Western Red Cedar rough sawed 2”x4”x8’
box of 3” exterior grade screws
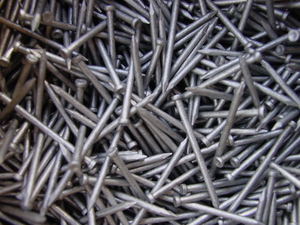
box of 3d 1-1/4” galvanized exterior finishing nails
measuring tape
drill
1/8” drill bit
saw
hammer
pencil
safety glasses
Step 1: Have the lumber yard rip (cut lengthwise) the 5/4” deck boards into 1” strips. These will be the slats within the trellis. Have the lumberyard rip the two 2”x4”x8’ pieces in half. These will make the 2”x2” pieces that will be the outer frame of the trellis. (You’ll have a 2”x2”x8’ piece left over for another project) To double the life of your wooden trellis, treat it with Timber Pro’s non-toxic Internal Wood Stabilizer.
Step 2 : Decide the final height of your trellis. The one pictured is designed for a finished height of about 2.5 to 3 feet. If yours is going to support larger plants like pole beans or cucumbers, you can make it taller. Add 18” to the final height of your trellis, and cut two pieces of 2”x2” to that length. Lay out one of the 2”x2”x8’ pieces, which will be the top piece of the frame, and lay the two side pieces against it as shown in the photo below. Drill two offset pilot holes on each side, and screw the two side pieces of the frame to the top piece of the frame using 3” exterior screws as shown in the photos below.
Step 3 : With the outer frame laying on a flat surface, measure the distance between the inside edges of the two vertical framing pieces. Cut enough of the 5/4 x 1” strips (that were ripped from the deck boards) so that you can place one horizontally every six inches from the top of the frame, down to about 18” from the bottom ( The bottom 18” will be in the ground) .Using a pencil, mark a small line every six inches on both the right and left vertical framing pieces.
Step 4 : With the trellis frame still laying on a flat surface, drill a pilot hole from the outside of the vertical framing piece through to the inside at each 6” mark. Place a horizontal slat within the trellis frame at each 6” mark, and fasten it to the frame by placing 3” screw through the vertical framing pieces and into each side of the slats.
Step 5 : Cut enough of the 5/4” x 1” strips so that you can place one vertically within the trellis frame about every 6”. Using the pencil, lightly place a mark every six inches. One at a time, place each vertical strip underneath the horizontal slats, and hammer a nail through the back of the horizontal slat and into the vertical slat. Do this at every intersection of the horizontal and vertical slats. Repeat this step until you’ve placed a vertical slat every 6” . If you’d like the same look as the trellis pictured here, leave a few inches between the top of each vertical slat and the top of the trellis frame.
Step 6 : Push your new trellis some well prepared garden soil, and start growing!


Reader Comments