(704) 568-8841

STAY IN TOUCH

Follow us on TwitterFollow us on FacebookFollow us on FlickrFollow us on Pinterest

Instagram

We are active on TwitterFacebook, and Flickr with gardening tips, news, and updates. Follow us and stay in touch.

Here are some photos from our Flickr account.

Search

FREE NEWSLETTER!

Get important updates, tips & tricks on edible organic gardening, micro-farming and more. 

If you aren't one for filling out forms, fret not!

You can call us at
(704) 568-8841

Or you can send us an email
hello@microfarmgardens.com

If you want to hire us for your project, need a quote, or if you have a few questions,
fill out the following and click submit. We'd love to help. 

Fill out my online form.

Wednesday
May132015

Finally Free to Garden

Don and Barbara recently found themselves with more free time on their hands. A lot more free time actually. Their youngest was  settling into his new dorm room, and Don had just  retired from a  demanding  and decorated law career.  Even when things were busy, the couple had still made time for healthy eating, including lots of green vegetables with most meals. And while the pace at house is more relaxed now, the focus on fresh organic produce hasn’t diminished one bit.

In fact, the couple decided that an organic garden would give them the steady supply of produce for the kitchen, and a hobby that they can enjoy together.

Don Caldwell's Organic Garden from Microfarm Organic Gardens on Vimeo.


After researching raised bed designs they decided what they needed was a taller style that would give them a place to sit and garden comfortably, and they insisted on untreated red cedar for durability and beauty. The couple was excited about gardening, but not at the prospect of bending over all the way to the ground, and certainly didn’t want to begin their new adventure by using treated wood. Our  Kitchen Garden design fit the bill perfectly, and we placed it just outside the couple’s kitchen window.  We created an L shaped design measuring 3’ wide and 8’ on the long sides, with a 3’x3’ square bed. The garden sits about 19” high - about the same height as the typical chair or bench – and is tall enough for some really comfortable gardening, as well as keeping out rabbits and pets.

Don and Barbara have a few trips on the calendar this summer, and so we installed a drip irrigation system and connected it to a battery operated timer at the hose bibb on the back of the house.  Those tomato, squash and pepper plants will never even know they left.

All those sunny mornings glimpsed through the window of the law office are a thing of the past. There’s no more rushing around. Don and Barbara can take as long as they want together, working in their new organic garden.

Sunday
Apr192015

Queen's Coop Tour + Yardbird Fair on Saturday May 2nd


Your organic garden is dialed in. Herbs are thoughtfully companion planted among edible crops. Your compost pile churns out steam like a locomotive when you turn it. You’ve had your eye on backyard chickens for a while now. You’ve seen the bright orange yolks in the pan. Friends won’t stop raving about how much fun their hens are.

But you still have a few reservations.

What would a coop look like in my backyard? What would it smell like? What would the neighbors think? How difficult is it to care for chickens?

Now is  your chance to see firsthand at the Queen’s Coop Tour + Yardbird Fair presented on May 2nd by Four Dogs Pet Supplies.

The day kicks off at 8:30am with breakfast provided by Heist Brewery, followed by a class from 9:30a-10:30a on raising backyard chickens, presented by Jeff Mattocks. Jeff is a chicken expert, and author of Feeding Pasture Raised Poultry.


Tickets are $10, but the class is limited to 20 people, so be sure to buy tickets now at Four Dogs Pet Supplies. The class fee also includes a map to the ‘Free Range’ Coop Tour which begins at noon. Jeff will stick around until around 11:30a for questions & answers, and copies of his book will be available for $8.95 during the class. 


The Microfarm team will have a mobile Garden Ark Coop on display at Four Dogs Pet Supplies during the event, so be sure to stop by and say hello to Miriam and Loddy Doddy, the spunky Silver Laced Wyandotte hens.

The ‘Free Range’ tour of local chicken coops begins at noon and ends promptly at 4pm, so be sure to plan accordingly so you’ll have time to visit all of the coops.  Queen’s Coop Tour Tickets are $10 and can be purchased either in advance, or the day of the event, from Four Dogs Pet Supplies. Tour maps will be available beginning at 11:30am on the day of the event.


Remember, your vote counts! Prizes will be awarded for the most eco-friendly coop, funkiest/best decorated coop, and also to the “Chicken ala Queen” for the people’s favorite.

Purchase your tickets early and join us for a fun-filled day of all things chicken.


Raising backyard chickens is a laid back affair, but to make the tour fun for everyone, please observe these guidelines:

- Please be respectful of coop owners.  Do not arrive prior to noon or after 4pm.

-Foot tubs and vinegar will be placed at each coop to help prevent cross contamination between coops. Vinegar is a natural disinfectant and will work to kill the bacteria hiding in your shoes as well as combat unpleasant odors.

-Please leave companion animals at home. Not all dogs are chicken savvy – nor are all chickens dog savvy.


Queen’s Coop Tour Event outline


  • 8:30:  Breakfast at Four Dogs by Heist Brewery
  • 9:30am  Chicken Nutrition lecture by Jeff Mattocks, Limited seating.  $10 includes admission and a map.
  • 10:30am  Sqawk about all things Chicken with friends, neighbors and our expert nutritionist.  (FREE)
  • 11:30am  Live Birds, Coops, Coop Design by Microfarm Organic Gardens
  • Noon:  ‘Free Range’ Coop Tour Begins
  • 4pm : ‘Free Range’ Coop Tour Ends


Thursday
Feb262015

Thanks for the Kind Words

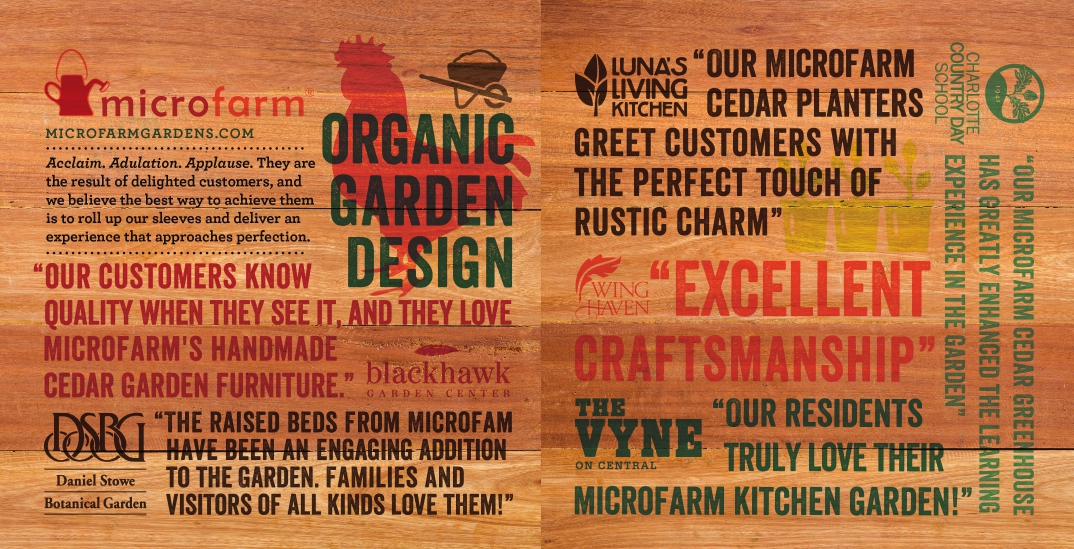
Much can be accomplished with good advertising. Vivid colors, clever copywriting, memorable design, and striking photos tug at our emotions like an old home movie. A smart web presence and elegant printed collateral can certainly get the phone ringing, but none of it can hold a paddle hoe to a personal endorsement. A neighbor sharing a positive experience over the fence. A friend at work raving about  unexpected, and delightful customer service. A happy (and talkative) customer will add ten times the shine to a company's image, and we're thrilled to have some of these  loyal customers behind our brand. While each customer's story is a little different,  the end result has been the same. Delight. Joy. Satisfaction. Visit the links below to see photos of each customer's project. We think you'll like what you see, and hope you'll find the inspiration to create a Microfarm story of your own.


Country Day School Greenhouse

charlottecountryday.org


Blackhawk Garden Center's Organic Garden

blackhawkhardware.com


Daniel Stowe Botanical Garden's Organic Garden

dsbg.org


Vyne on Central's Organic Garden

vyneoncentral.com


Luna's Living Kitchen's Cedar Planters

lunaslivingkitchen.com


Sunday
Feb222015

Heating A Greenhouse

Depending on where you live, winter can be a gentle experience with the occasional flurry sighting, or a harsh gulag lasting half the year.  While plenty can be done with an unheated greenhouse,  for many growers, a greenhouse heating system is a necessity during the winter months.

When planning a heating system for your greenhouse it helps to understand a little about how heat is both created, and lost.

A greenhouse loses heat in four ways :

Conduction : Heat moves through an object from one medium to another : from inside the greenhouse to the outside through the frame and glazing

Convection : flow of air caused by a difference in temperature : hot air rises from a heater because cold air is drawn in at the bottom.

Radiation : Heat transfers away from an object through space without the necessity of a medium. Greenhouse glazing can either absorb, store or reflect radiated heat.

Infiltration/exfiltration :  Cracks under doors and vent windows, and glazing seams allow cold air to enter (infiltration) , and warm air to escape (exfiltration). In a greenhouse, warm air escapes through cracks in the roof, drawing cold air in through openings near the floor.


How Much Heat Do I need?

Before investing in a heating system, the first step is to determine how much heat you need. While it’s possible to use formulas to calculate both the solar heat generated on a clear day, and the heat lost due to convection, conduction, radiation, and infiltration/exfiltration, there’s a  simpler formula to approximate  how much heat you’ll need to add:

(wall area + roof area) x difference in temperature between outside and inside the greenhouse x 1.1= Number of BTU’s required.

Now that you know how much heat is required to keep your greenhouse warm, it’s time to create a heating system. This may be passive heating system, and active heating system, or combination of the two.


PASSIVE HEATING SYSTEMS

Passive heating systems use water or stone to store solar energy during the day, and radiate it back into the greenhouse at night, while the hot bed method uses heat produced from the decomposition of organic matter.


Water storage tanks

Large tanks or drums filled with water, and painted black, soak up solar energy on sunny days and radiate it back into the greenhouse at night. The challenge this method is warming the areas in the greenhouse that are furthest from the water tank  ; even with circulating fans, the areas farthest from the tank can experience a dramatic temperature difference. Also, consider that tanks can freeze in winter after a few days without direct sunlight.  Thawing a frozen tank takes a lot of sunlight and heat , actually cooling the air around it as it does.

Placing the tank in the middle of the greenhouse where it is less likely to freeze is one way to address this, and, while sort of diminishing the goal of using passive solar energy, an electric aquarium heater can also be used to prevent the water in the tank from freezing.

A solar water heater can also be used to heat liquid that is then circulated through copper pipes to a heat exchanger inside the water storage tank, but again, the system only works when the sun is shining. On cloudy winter days, these systems are often supported by a wood or pellet fired stove or furnace.


Rock Heat Storage

These systems comprise insulated heating bins filled with large chunks of rock that absorb solar heat blown across the medium by fans during the day, and then circulate the warmth back into the greenhouse at night. While they require little to no maintenance once installed, rock heat storage systems do require a substantial amount of volume:  every square foot of greenhouse glazing, 3 cubic feet of rock is needed. While large wire baskets can be used to store the chunks of rock, a more efficient way is to place 3- 4 feet of rocks beneath an insulated floor.


Hot Beds

For greenhouses where growing beds are used, the energy created by decomposing manure can be used to warm the grow environment around the plants. Simply dig out the beds down to a depth of about 3’ and fill them with horse manure and other compostable material like leaves and grass clippings, back to about a foot below the top of the beds. Then top that off with garden soil. As the organic matter breaks down, the temperature will increase to about 160 degrees over the course of about 5 weeks, remaining there for about two months before gradually cooling down to about 80 degrees. 


ACTIVE HEATING SYSTEMS

Systems that draw on sources other than the sun, including coal, wood, wood pellets, gas, oil and electricity are referred to as active heating systems.  While certainly more expensive to operate than passive heating systems, active heating systems afford much greater control of the temperature in the greenhouse, and allow for much higher temperatures.  Insulating the north wall and opting for multi-wall glazing will help offset the cost of running an active system.


Electric Heating

Clean and simple to use, electric heaters of course require that your greenhouse is wired for electricity. While electric heaters themselves don’t have to cost a lot, the cost of the electricity they use can add up fast in winter, especially if the greenhouse is poorly insulated.  Costs can be controlled by maintaining a temperature between 40 and 50 degrees during winter, which is warm enough to keep most plants healthy, without producing sticker shock when you open the power bill.


Wood and Wood Pellet Burning Stoves

While larger greenhouses are commonly heated with 55 gallon drum stoves vented with a chimney, a standard wood burning stove is adequate to heat most hobby greenhouses.  Besides the need for constant feeding, which means frequently opening the door and allowing heat to escape, the logs can also introduce insect pests into the greenhouse.  A better, but more costly option is a wood burning furnace placed outside the greenhouse. This means no heat lost opening the door, or unwanted insect pests, and it also eliminates any risk of carbon monoxide accumulating inside the greenhouse.


Coal Stoves

While they share many of the same benefits of wood burning stoves, including the ability to generate a lot of heat, they must also be monitored and refilled.  Consider where you’ll store the coal and dispose of the coal ashes.


Gas Heaters

Usually designed to run on either propane (LPG) or Natural Gas (CNG), gas heaters are easy to use, and safe as long as they are operated properly.  If the unit doesn’t have adequate ventilation or air intake, the oxygen in the greenhouse can become depleted, creating a hazardous environment for people. Propane leaks can also damage your plants. Models that require no outside power source are ideal, especially as a back up to an electric heating system.


Thursday
Feb122015

Egg Production: How It Works


With a puzzled look, the mailman has just handed over your new baby chicks. Even the least observant among us could readily see that it will be a while before these peeping fluff balls begin laying eggs. But how long will that be? And how does it work, anyway?


When a pullet (female chicken) is born, her body holds as many as 4000 ova, which are undeveloped yolks.  When she begins laying – usually around 24 weeks – the eggs will initially be small, with one laid only every 3 or 4 days.  At around 32 weeks of age, laying will increase to about two eggs every three days, and the eggs will reach a normal size.

One at a time, the ova will grow into full size yolks, and drop into the oviduct : a 24” long tube that surrounds the yolk in egg white and encloses it in a hard shell.  The process  takes about 24 hours, and which point the egg is ready to be laid.


The total number of eggs a hen can ever lay is limited to the number of ova she was born with, but few chickens will live long enough to lay all 4000. ; most laying hens will produce somewhere around 1000 eggs in their lifetime.


In her first year, a healthy laying hen produces about 250 eggs, and at around 18 months of age, the molt process begins.  During the molt, which happens once a year – typically in the fall- old feathers gradually fall out and are replaced with new ones.  The process takes about three months, and few  if any eggs will be laid during this time because a hen will divert all of her energy to growing new feathers.


With the molt process complete, and donning her chic new coat of feathers, a hen will begin laying again. While the eggs are larger, typically the amount of eggs will taper to around 200 eggs per year.

Ultimately the number of eggs a hen produces depends on a set of factors including breed, health, living conditions, and weather.  The ideal temperature range for optimum laying is between 45 and 80 degrees, and laying tapers off when it is below or above that range.

Because shorter day lengths will eventually dip below 14 hours, even healthy hens will cease laying in Winter. An easy solution to this is to install a 60 watt light bulb in the coop, combining the light with natural daylight to provide at least 14 hours of continuous light.